Step 1 – Remove the Tap Spout
Before starting, turn off the water supply. Remove the tap spout. Depending on your tap model, the spout will usually be held in place by either:
- A small grub screw located at the back of the spout, or
- A locking nut at the end of the spout.
Once removed, clean the spout thoroughly and remove any old grease, dirt, or debris before fitting the new O-Rings.
Step 2 – Replace the O-Rings
In most cases, you will only need to replace the black rubber O-Rings. The white O-Ring rarely needs replacing unless it is cracked, broken, or showing signs of damage.
Apply a small amount of plumber’s grease or washing-up liquid to help the O-Rings slide into place without stretching or damage. Do not use Vaseline, as it can cause the rubber to deteriorate over time.
Step 3 – Refit and Check
Once the new O-Rings are fitted, carefully refit the spout, tighten everything back into place, and check that the tap operates smoothly with no leaks.
Important Information
If your tap spout has pinholes, corrosion, or visible damage, replacing the O-Ring kit will not solve the problem.
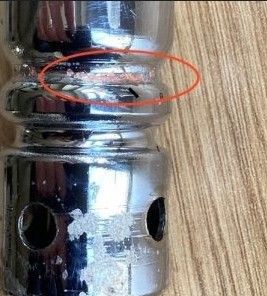
We strongly recommend checking your spout carefully before ordering a replacement kit to make sure the spout itself is still in good condition.


