My Franke Athena tap is leaking from the base of the spout. What do I need to replace?
If your Franke Athena tap is leaking where the spout meets the main body of the tap, the most common cause is worn or damaged O-rings (seals).
In most cases, replacing the O-rings will restore a watertight seal. If the spout itself has become damaged, cracked or has developed a pinhole, the complete spout will need to be replaced.
How do I remove the Franke Athena spout and replace the O-rings?
1. Turn off the water supply to the tap.
2. Unscrew the locking nut at the bottom of the spout by turning it anti-clockwise, then remove it.
3. Pull the spout vertically upwards to remove it from the tap body.
4. Remove the old O-rings and replace them with new ones. Usually only the black rings needs to be replaced.
5. Apply a small amount of silicone grease to the new O-rings to help protect the seals and ensure smooth spout movement.
6. Refit the spout into the tap body, ensuring it is correctly positioned.
7. Refit and tighten the locking nut securely.
8. Turn the water supply back on and check for leaks.
My Franke Athena spout has pinholes. Can it be repaired?
If your Franke Athena spout has developed pinholes, cracks or other signs of corrosion, it cannot be repaired. We recommend replacing the complete spout to restore the tap and prevent further leaking.
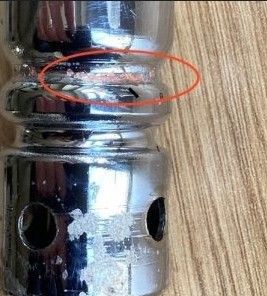
We stock replacement spouts in Chrome, Silk Steel / Brushed Nickel & Matt Black, allowing you to replace the damaged spout without replacing the complete tap.
Which valve does my Franke Athena tap need?
Franke Athena taps were fitted with two different valve types. Earlier taps use the SP1212 / 1212R valve, while Franke changed to the SP3819 valve in 2013.
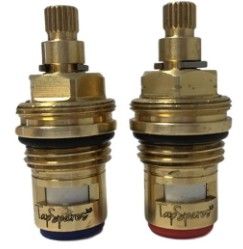
1212R Pre 2013 Valve
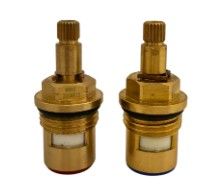
3819R Post 2013 Valve
Before ordering, check your original installation guide or the valve currently fitted to your tap to confirm whether you require the SP1212 / 1212R or SP3819.
My Franke Athena tap is dripping from the top of the spout when turned off. What is the problem?
A dripping spout is normally caused by a worn or damaged ceramic valve. Replacing the faulty valve will usually stop the drip and restore normal operation.
It is often recommended to replace both valves at the same time, as they are typically the same age and may have experienced similar wear.
My Franke Athena tap is leaking around the handle. What needs replacing?
Water leaking from beneath the handle or around the top of the tap body is usually a sign that the ceramic valve has failed.
Replacing the valve is the recommended repair. We stock the Pre 2013 valve and the Post 2013 valve
How do I remove the Franke Athena lever handle?
1. Remove the indicator from the side of the handle. Something as simple as your finger nail or tweezers can remove the indicator.
2. Using a Phillips screwdriver, remove the screw underneath the indicator.
3. Pull the handle outwards and away from the tap to remove it.
What tools do I need to replace the valve?
Most Franke Athena taps require:
- A Philips screwdriver to remove the handle.
- A 17mm spanner or adjustable spanner to remove the valve.
- Silicone grease (recommended when replacing seals).
My old valve came out with the brass bush attached. What should I do?
On Franke Athena taps, the brass bush can sometimes come out attached to the old valve. The bush can often be separated from the old valve and reused.
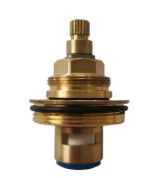
1212R Valve in 3408R Bush
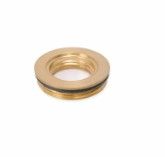
3408R Bush
To remove the old valve from the bush:
- Apply penetrating oil, such as WD-40, to the valve threads and allow it to soak for several minutes.
- Hold the brass bush securely using a cloth and adjustable spanner or a soft-jawed vice.
- Carefully unscrew the valve anti-clockwise.
- Clean the bush thoroughly before refitting it into the tap.
- Install the new valve into the bush.
Avoid using excessive force, as this may damage the bush. If the bush cannot be separated from the old valve, it may need replacing. We stock the 3408R replacement bush for the Franke Athena. There is one bush per valve.
Should I replace one valve or both?
If one valve has failed due to normal wear, the other is often not far behind.
Replacing both hot and cold valves together can save time and help avoid having to carry out another repair shortly afterwards.
How do I know whether it's the hot or cold valve that needs replacing?
It isn't always obvious which valve has failed. Even if the tap seems to be dripping from the hot side, the problem could actually be the cold valve, and vice versa.
The easiest way to find out is to turn off one water supply at a time:
- Turn off the hot water supply and see if the dripping stops. If it does, you'll need a new hot valve.
- If it still drips, turn the hot water back on, then turn off the cold water supply. If the dripping stops, you'll need a new cold valve.
If you can't turn the hot and cold supplies off separately, or you're still unsure which valve is causing the problem, we recommend replacing both valves together. They're usually the same age, so replacing both at the same time can save you having to do the job again later.


